
Supposedly you have a Minecraft game server and you want to use a example.com address, you can do this by means of an A record and an SRV record. But how is the structure of this and how do you set it up?
Note: It is not necessary to create an A record if you host the Minecraft server on our Minecraft server hosting.
In general, you can already create an A record for play.example.com via the DNS management of your provider to the ip address of your server. The SRV record can sometimes be different per provider, how it can be set.
The SRV record must contain the following elements:
- Service
- Priority
- Weight
- Port
- Target
For a Minecraft play domain it will be something like this:
| Service | Priority | Weight | Port | Target |
| _minecraft._tcp.play | 0 | 00 | The port of your Minecraft server, the default Minecraft server port is 25565 | The target you want to connect to, it will define the IP of the server. If you have set the play.example.com A record it is: play.example.com If you are using a Minecraft servers it is something like play.example.com |
We have listed some examples of setups on different dashboards and services.
Step 1 #
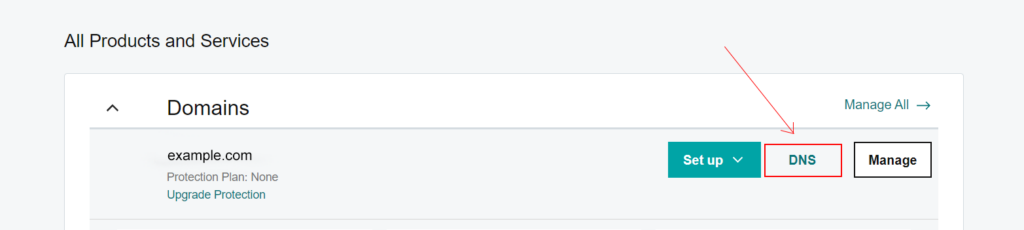
Trough the Godaddy domain, click on “DNS” to enter the DNS settings.
Step 2 #
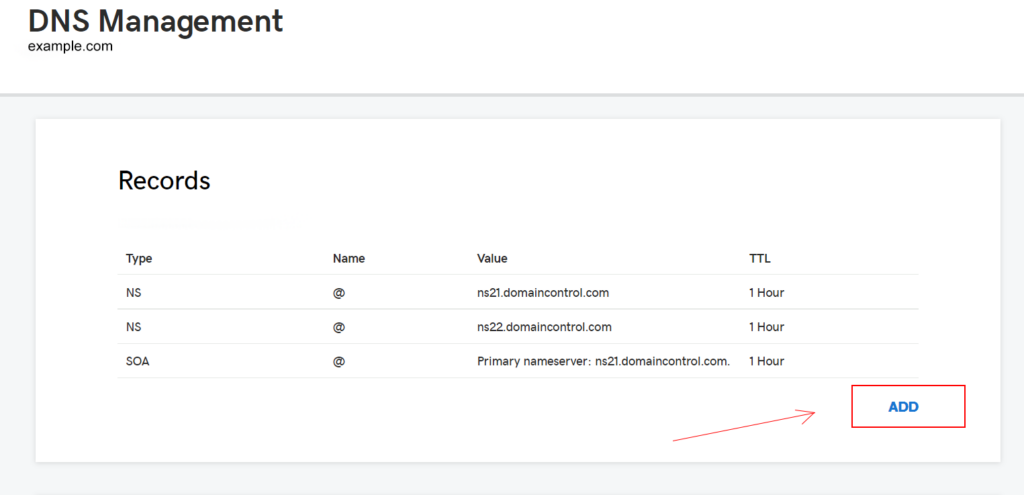
- Click on the button “Add” to drop down the new record form.
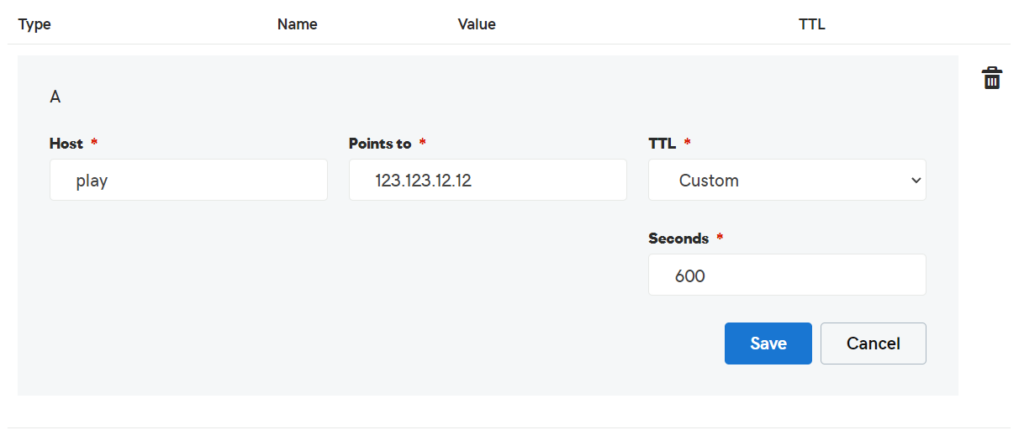
- In “Name” you fill in the name of your subdomain, in this example we want play.example.com so we fill in “play”. if u don’t want subdomain use “@” on Name
- In “Points to” you need to fill in the IP of your server. If you host a Minecraft server by Lectron, you can find that IP in your server dashboard at dashboard.lectron.com under the tab “Allocation Settings”.
- on “TLL” select custom and type 600 seconds.
- Now click on Save.
Step 3 #
To let Minecraft now what port and what connection protocol to follow we have to setup an SRV record.
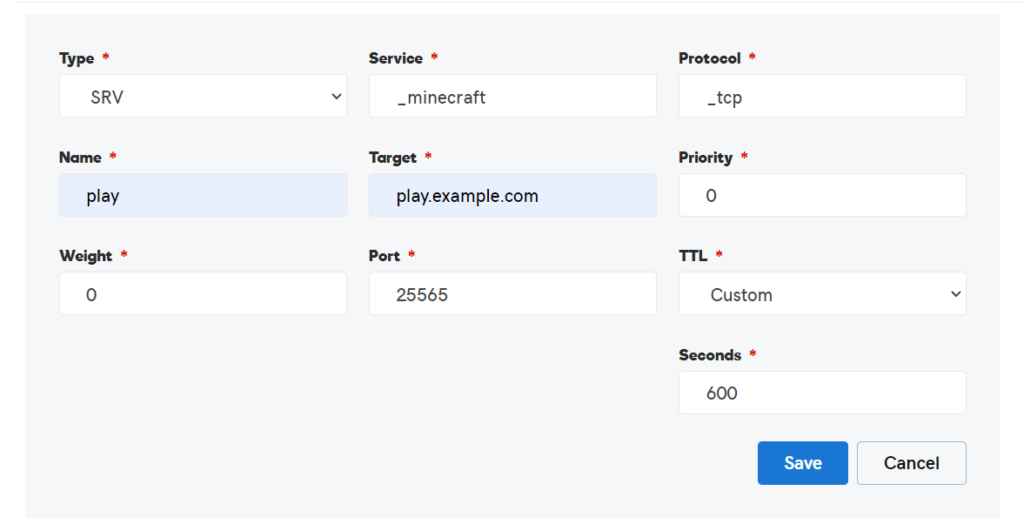
- The “Type” has to be set to SRV, you can just select this out of the list.
- In “Service” you fill in “_minecraft”.
- The “Protocol” type “_tcp”.
- In “Name” you fill in the name of your subdomain, in this example we want play.example.com so we fill in “play”.
- connection address, it are the numbers after the colon.
- If you did Step 2 then you put in “Target” the subdomain you created, for example “play.example.com”, you can find that target in your server panel at dashboard.lectron.com in your server list as connection address, it is the address before the colon.
- In “Priority” you fill in “0”.
- In “Weight” you fill in “0”.
- In “Port” you fill in the port of your Minecraft server. you can find that port in your server panel at dashboard.lectron.com in your server list as connection address, it are the numbers after the colon.
- on “TLL” select custom and type 600 seconds.
- Now click on Save.
Once you have set this, it will work after 2-4 hours and you can use your play.example.com address or if you types “@” on name use example.com.